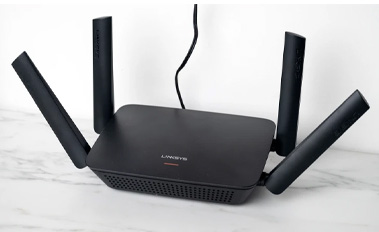
Linksys RE9000 WiFi range extender is a part of the AC3000 model series. It is a new extender which has a shape of the WiFi router. In this device, you will get four LAN ports, a WAN port, a power connector and WPS button to connect wirelessly to router.
The Linksys RE9000 extender cannot be plugged into wall socket directly, instead you will get power cord and Ethernet cable to supply power and for connection in the box.
Here in this page, you will get to know how to the complete the Linksys RE9000 setup with the help of some easy instructions. At first, you will go through a section, which contains physical connection steps and then information about how to access the Linksys wireless extender interface.
This section contains two different parts that explains how to connect the extender to the home router and how to log in to the Linksys interface to adjust its settings.
You must un-box the extender and take out main device, its antennas, Ethernet cable, power cord, and user manual. There are two methods to connect both router and extender together; via Ethernet cable, and WPS button.
Place the extender close to the WiFi router, find WAN port of the extender and router’s LAN port and connect the cable to ports.
Now, establish the network connection by turning on both of the networking devices. Just connect the power cord of the extender to an electric wall socket and turn it by pressing the On/Off button.
To connect with the help of WPS button and establish the network wirelessly, you have to start the extender by plugging its power adaptor to the wall socket.
Now, just press the router and extender WPS button to connect them together automatically.
After linking the router to extender, you have to access the interface of the device to complete the Linksys WiFi extender Setup easily.
You can simply log in to the Linksys interface main menu with the help of your computer or laptop. Follow some of the easy intersection written down here.
If you have reach this far, then you have successfully completed the Linksys RE9000 setup. you will see Linksys extender blinking lights after completing the setup.
You should also know how to upgrade the Linksys extender. Also, if a big problem occurs in future, you must have the knowledge of how to reset and reboot the Linksys RE9000 device.

After some time the device will reset, but all the previous settings will be deleted. Then, you have to get the access to the interface menu and adjust the settings again.
So, this is the end of an informative page, hope you have successfully settled and completed your Linksys RE9000 setup with the help of simple instructions given above.