Linksys RE3000W Setup
You have to connect the Linksys wireless extender to the home WiFi router first, which you can do with Ethernet cable as well as WPS method;
Ethernet Cable
- Connect the cable to the extender Ethernet port and connect the other end to the router LAN port.
- Turn on the extender by plugging it in to the wall socket near to the router.
WPS Method
- You have to turn on the WiFi extender first.
- Then, press the WPS button on the router.
- Press the WPS button on the extender within 2 minutes.
Linksys RE3000W Interface Login
The Linksys extender is easy to connect with your router via Ethernet cable or WPS method. After that, you have to log in to the interface to the complete the configuration and setup. Let’s see how to do it using some instructions;
- You have to link a computer or laptop to the network named Linksys Extender Setup.
- Then, open up the web browser, which should be updated and search the URL extender.linksys.com or IP address 192.168.1.1.
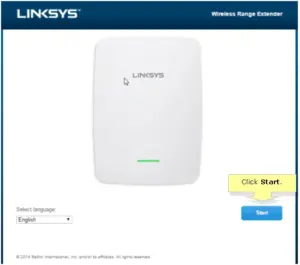
- The computer screen will open up the setup page of the Linksys extender.
- You have to click on the I Agree button to accept the License Agreement.
- Then, it will show you the home wireless network, where you have to select your WiFi network name or SSID.
- On the screen, a password for your WiFi device will be demanded, just enter and click on NEXT button.
- After that, your extender will be configured and you can use its internet services easily by connecting your phone, laptop, tablet or any other device.

Now, you will get to know how to update the Linksys RE3000W extender using below given steps;
Update RE3000W Firmware
You have to download the Linksys firmware version file and then install it in your extender, let’s see how to do it;
- You have to go to your web browser in your computer and search for the Linksys store and download the latest version of firmware.
- Then, to install it you have to access the login interface using IP address 192.168.1.1 or URL extender.linksys.com.
- In the interface, select the Settings> Firmware tab> paste the file and click on Install button.
- After completing installation, the extender will reboot itself and after that you can easily connect to extender network.

Now, let’s see how you can change the Linksys WiFi password and its Admin password.
Change Linksys WiFi Password
There are simple steps to change your admin and WiFi password of the Linksys WiFi extender;
Admin Password Change
Access the interface and go to the Advanced Settings> admin> type password> Click Save button.
WiFi Password Change
Access the interface window and go to the Advanced Settings> Wireless Settings> Wi-Fi Password> type username and password> Save the changes.
The Linksys RE3000W setup, updating, and changing passwords were easy to do, but what if technical issues come, below are the solutions;
Reboot and Reset Linksys RE3000W
Reboot
To restart the Linksys WiFi extender, you have to follow below written steps;
- Find the power button and press it twice.
- Find the power cord and plug it out, plug it in the wall socket.
Reset
To reset or clear out the data and factory reset the settings from the extender, you can follow these below given instructions;
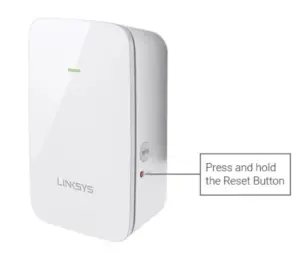
Find the RESET pinhole button, and long press it using a pin or a sharp object.
The hard reset will start, and after that, you have to re-do the Linksys RE3000W setup again using Extender.linksys.com or 192.168.1.1.

