Linksys RE1000 is one of the oldest and most used WiFi range extenders from N300 family brought in by Linksys. You can get it up and running with the help of the WPS method as well as using the setup CD that arrives with the package. Now, let’s help you understand how to complete Linksys RE1000 extender setup in easy steps.
Like all other extender models from Linksys, the RE1000 range extender can also be set up using the WPS button present on the extender. However, this approach will only come handy if your main router too has the WPS button. Here’s what to do for Linksys N300 setup via WPS:
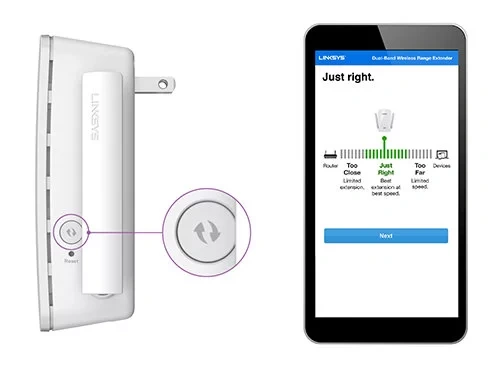
Note: Just in case, you are unable to find the WPS button on the router, consider accessing the web GUI and look for the WPS option. Click the option after pressing the button on your range extender.
Refer to the steps given below if you want to install your WiFi range extender with the help of a Setup CD. Know that the computer you are going to use for the setup process must be connected to the WiFi network of the router or AP to which you will connect the extender.
In this manner, you can set up the extender with the help of the setup CD. Just in case, you have lost the setup CD, you can complete the installation process by accessing the extender.linksys.com URL on a computer connected to the Linksys RE1000 extender.
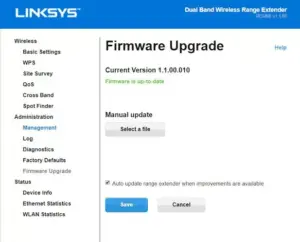
You are supposed to keep the firmware of your RE1000 extender up-to-date after setting it up. This is because when the extender works on an outdated firmware version, it starts lacking the latest features which can be problematic. The instructions to upgrade the firmware are mentioned below:
In order to reset the Linksys RE1000, you can either use the web interface or reset it directly with the help of a button present on its hardware unit. The extender can be reset if you are facing issues accessing 192.168.1.1 i.e. default IP of the extender or you are facing Linksys RE1000 extender setup issues. Here are the steps to reset the extender:

Note: You must know that the reset process erases all the personalized settings from the extender. Therefore, you will have to perform Linksys RE1000 after resetting the extender.
Mentions of any brands, products, or services are for reference only and do not imply any association, ownership or endorsement.