Linksys AC1900 Setup
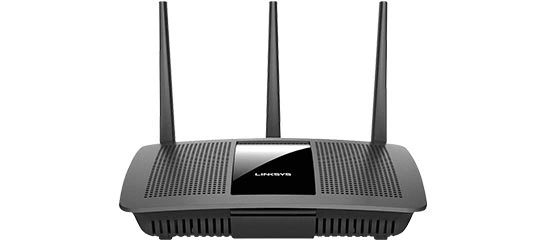
Linksys manufactures routers as well as extenders that work on AC1900 networking standard. For your information, the term AC means that the device supports 5GHz connections and works on the latest 802.11ac (Wi-Fi 5) standard. On the other hand, the number 1900 after AC represents the router’s or extender’s bandwidth i.e. 1900Mbps. On this page, you will find important information related to Linksys AC1900 setup.

How to Log in to Set Up Linksys AC1900 Router?
The router acts as a host for the extender. Thus, first of all, we will discuss the steps to set up a Linksys AC1900 WiFi router. You can complete Linksys router setup after logging in to it. So, we have divided the process in two stages.
Stage 1: Log in to Linksys AC1900 Router

- Plug in your router to a power source and switch it on.
- Using an Ethernet cable, join the LAN port of the modem to the Internet port of your Linksys AC1900 router.
- Connect your PC to the router’s WiFi.
- The WiFi credentials are given at the router’s bottom.
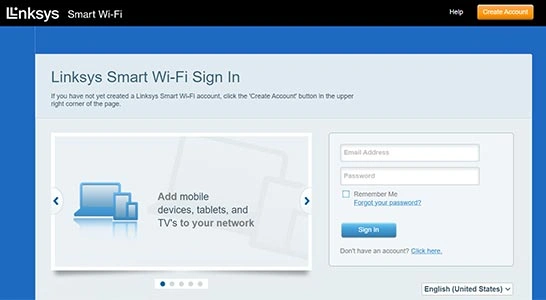
- Go to linksyssmartwifi.com now.
- You can also access 192.168.1.1 IP.
- Accept the terms and conditions and select Next.
- You will get logged in to your Linksys AC1900 router.
Stage 2: Set Up the Linksys AC1900 Router
- If you want to bypass Smart Setup, click the Manual Configuration link at the bottom-left corner.
- On some models, you will have to select I want to skip Setup and configure the router manually.
- Click Next.
- Customize the router’s settings.
- If you are a DSL user, the setup will ask for PPPoE Account Name and Password.
- Provide necessary details and select Next.
- Choose whether you want the router’s firmware to get updated automatically in the future or not.
- Give WiFi name and password to 2.4 GHz and 5 GHz radio frequencies.
- Create the router password and add hint also.
- You will see the summary on the “Your Router is Set Up” page.
How to Set Up Linksys AC1900 Extender?
You can complete Linksys WiFi extender setup for your AC1900 extender with the help of the web URL. The steps given in this section will help you install the extender via a computer. But, before that, know about alternate setup method.
Use this setup method if your host router has a WPS button. Just press the WPS button on your Linksys AC1900 extender after pressing the router’s WPS button. The process must be repeated if the host router works on dual-band frequency. Know that the process will fail if your devices are placed at larger distances > 8-10ft.
- Connect your PC to the Linksys extender network.
- Once done, open an internet browser and go to extender.linksys.com.
- Very soon, you will be prompted to accept terms and conditions.
- If your extender asks for the password, type admin.
- Once the login process completes, a network scan will happen.
- You should now select the host router WiFi name and input the WiFi password.
- Thereafter, assign admin password and WiFi details to the Linksys AC1900 extender.
- Update the firmware in case a new version is available.
- Relocate the extender using the Spot Finder feature.
- You are all done!
What is Linksys AC1900 Manual?
People find it difficult to use technical products and hence company sends user manuals with their products. Linksys AC1900 routers and extenders also come with user manual that consists of important details like default login and WiFi credentials, steps to reset the extender, instructions to update the firmware, and so on.
How to Update Linksys AC1900 Firmware?
Refer to the following table to know the instructions to update the firmware of your Linksys wireless AC1900 extender and router:
| Router | Extender |
|---|---|
| On your computer connected to Linksys router, open Internet Explorer or Apple Safari. | Connect your WiFi enabled PC to Linksys extender network and load an internet browser. |
| Access 192.168.1.1 and log in using the specified password. | From Linksys support site, download the extender’s firmware file. |
| Open new tab on the browser and download the latest firmware for your AC1900 from Linksys support site. | Go to extender.linksys.com and log in to the extender using the password that you set during the installation. |
| Return to the Linksys router web GUI. | On the extender’s dashboard, select Administration. |
| Click Administration > Firmware Upgrade. | You are now supposed to choose Firmware Upgrade. |
| Select the Browse button and locate the Linksys AC1900 router firmware file you downloaded earlier. | Under Manual Update, choose Select a File and upload the firmware file that you saved on your computer. |
| Click Open > Start Upgrade. | Click Save at last. |
Note: Once you upload the firmware file on your Linksys AC1900 extender or router, do not interrupt the process by switching off your device.
How to Reset Linksys AC1900?
Your device needs to be restored to the default factory settings if it is not meeting your expectations. You can also opt for the reset process if you cannot log in or your device becomes a victim of some serious issue. Here’s how you can reset Linksys AC1900 extender/router:
- Power up your Linksys AC1900 device if you haven’t done it yet.
- No device should be connected to your AC1900.
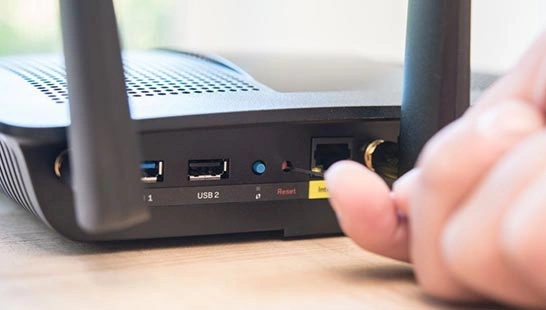
- Check all sides of the Linksys extender/router and find the Reset button.
- Press the button using a pointed object.
- Your Linksys extender/router will reset to default values.

You get an option to change the admin password during Linksys AC1900 setup. Along with this, you also get a chance to add password hint in case you forget it. However, if you want to change the password after the setup process, you will have to access the Administration tab of the Linksys device and enter the new password twice and the old password once.
