Linksys E1200 Setup
Linksys Cisco E1200 WiFi router is most used networking device in offices as well as houses. The Linksys E1200 setup is pretty easy, which includes physical setup, interface configuration, update and change password. We have also provided information about the WPS button and troubleshooting tips at the end. So let’s start Linksys router setup right away;
Linksys E1200 Router Setup
There are simple steps to connect Linksys E1200 router to your home network. You have to just connect router to the modem physically and then configure it through its web interface utility.
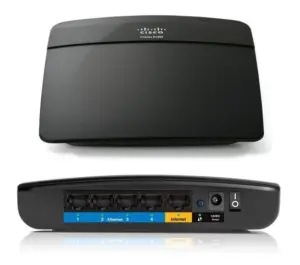
- Place the router near to the modem and make sure there is no other device connected to the modem with cable.
- Then, you have to use the Ethernet cable, and connect one end to the router WAN port, and insert other end to the modem LAN port.
- Now, you have to turn it on to connect with the Linksys network by computer. Then, you can configure the router.

Linksys E1200 Login Interface
To configure the router you have to connect the computer its network via LAN cable or SSID, so that you can easily access to the interface.
- First, connect your computer to the router.
- Go in to any updated web browser and type in the IP address 192.168.1.1.
- To search just press the Enter button and you will get to the login page of the interface.
The default login username is ‘admin’ and password is also ‘admin’ to access the interface.
Now, you have successfully access the interface where you can adjust the settings and create Linksys account as well.
- You will get to the interface window in your computer,
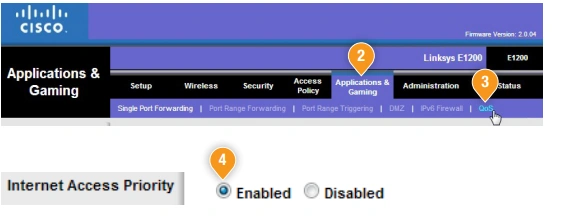
- Here, you have to go in to the Applications & Gaming tab/option.
- Just click on the QoS option on radial button.
- Click on ‘Enabled’ which is given next to the field labeled ‘Internet Access Priority’.

Now, if you want to set the router on particular upload speed then you can follow some instructions.
- Select the Upstream Bandwidth option and click on the Manual option which you will find of the drop down menu.
- Here you can type in your current upload speed and save the settings.
You also should know how to initiate Linksys router firmware update and change its WiFi password from the interface.
Update Firmware and Change Password
Update
Access the interface> go in Administration> Select Firmware> click on the Update button> reboot the router.
Change Password
Access the interface> Go in to Security> select WiFi password field> enter new password for your network> Apply all changes by clicking on SAVE button.
You can also connect other networking devices like extender or repeater without any use of cable or wire.
Use WPS Button to Connect Other Devices
To connect other networking device, you have to power on the devices and just press the WPS button on the router first. Then, press the same button on the extender or repeater within 2 minutes. The devices will connect to each other automatically, after that you must configure the connected device.
There can be technical issues with the Linksys E1200 setup and connection, so to solve them, you can use troubleshooting tips and solutions given below;
Reboot and Reset E1200 Router
Reboot Router
To reboot the router, you can use two methods given below;
- Find the power On/Off on the router device and press it twice.
- Plug out the router power adapter from wall socket and plug it in again.
Reset E1200 Router
To reset the router, you have to follow some of the steps provided below;
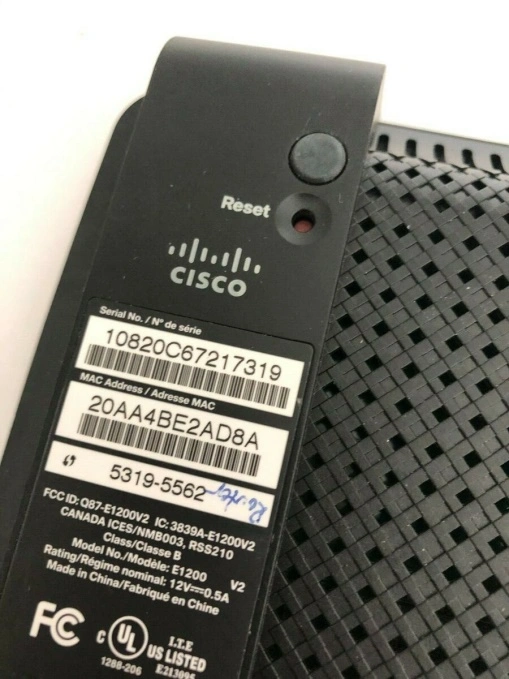
- Find Reset pinhole button on the router.
- Use sharp object, press and hold Reset button for about 5 seconds.
- Release the button and the reset process will start.
After resetting the router, you have to configure it again, because reset process will delete all the data from the router.

